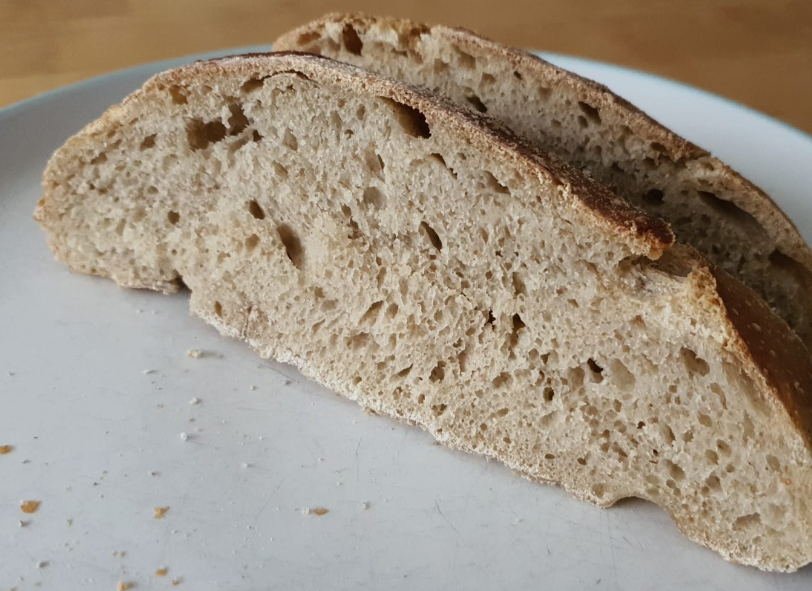
Let’s ‘get started’ and let’s keep it manageable. Three steps: mixing, shaping and baking.
Sourdough hydration refers to the percentage of water to flour in your recipe. A lower hydration means a thicker dough, that tends to be a little easier to handle and a stiffer bake. As you grow more confident, you can decide when you are ready to work with a higher hydration sourdough.
Ingredients or sourdough recipe:
- 160g sourdough starter
- 230g water
- 400g flour (a combination of not more than 100g whole wheat flour, and 300g white bread flour)
- 6-8g salt
Mixing
Gently mix the water and starter, then flour – wait 10 minutes so that the flour fully absorbs or incorporates the water.
It will look ‘shaggy,’ dry even. Do not be tempted to add extra flour or water – the dough will respond. Even in that short time, the dough will look noticeably different. More importantly, it will handle differently.
Knead the dough in the bowl for 8-10 minutes. Avoid over handling the dough, work positively.
Notice how the dough feels and responds.
Add the salt and knead the salt through. Salt is mainly for flavour however salt also helps to develop the gluten in sourdough and helps preserve the sourdough.
Cover the bowl with your tea-towel and leave for another 10 minutes.
Proof
Every half hour, we stretch and fold the dough three to four times (four occasions).
Notice how the dough responds.
Remember, stretch, quarter turn, repeat.
Long fermentation
4-6 hours (temperature dependent, 4 hours in warm conditions, 6 or longer in colder temperatures)
OR
Overnight in the fridge.
Shaping
After the long ferment – (10 hours or 12 hours after you started the dough at this point)
Be progressively more gentle from here on – gently stretch dough.
Notice how the dough is far more elastic and how it responds.
10 minutes rest and then shape (creating tension in the dough surface).
Line the bowl with a tea-towel, basket or banneton. Flour (or rice flour) the bowl to make sure your dough does not stick to basket or tea-towel.
Prevent from drying, cover with the tea-towel pr pop in a plastic bag or plastic shower cap.
Final fermentation
Allow to rise and double in size, for the last time for about 2-3 hours. – Notice how the dough responds.
Sourdough works in a range of 21-30°C (70-85°F), best 25-28°C.
Baking
Is my sourdough ready to bake? First, look for volume (doubling in size). Now look for texture and small bubbles on the surface of your dough.
- Poke test: Flour your thumb and gently press up to 1 cm deep into the dough. If the dent is still visible one minute later, your dough can be baked.
- Re-test every 15-20 mins.
- If it springs back immediately, it needs more time.
- If it slowly springs back about halfway it is ready to bake.
- If it does not spring back it is overproofing and should be bake right away.
- Re-test every 15-20 mins.
- Below 4C the fermentation comes to a halt. The dough can rest in the fridge for up to 24-48 hours.
Preheat your oven (and the dutch oven): There is quite a bit of advice for that preheating to be prolonged – 20-60 min to 230-240°C.
- Oven temperature is a key factor – for crumb and crust.
- Your Dutch oven will preheat more slowly than your oven thermostat reading.
- Small Dutch ovens bake hotter than large Dutch ovens.
Scoring: Make shallow cuts (scores) at a low angle on the surface of the dough with a lame before baking, I have used scissors, (even a very, very sharp knife is not ideal). The incision allows the bread to expand properly (the fancy word they use is ‘oven spring’ to create the ‘belly’ and the ‘ear’). This gives the loaf that artisan appearance.
Bake: Every oven is different. Preheat 230-240°C. Once the bread is in the Dutch oven, in the oven, reduce the temperature to 200-180°C.
- Baking with steam is essential for achieving an optimal oven spring. In a Dutch oven, the hydration of your loaf creates its own steam chamber.
- After 25-30 minutes, remove the lid and bake until you have the desired mahogany brown crust.
- Go off the colour – not time. The Maillard reaction responsible for the golden-brown mahogany crust arises from the high temperatures.
- Let it cool. Do not cut into your loaf when it is just out of the oven or super warm. Patience.
- Sourdough keeps for a week. We have not managed to keep one for more than two days. Remember you can slice, freeze and toast to make the dough even more bio-accessible.
The relationship between temperature and flavour
Yeasts ferment most efficiently 25-28°C, consuming sugars from the dough with the least amount of byproduct- resulting in a milder flavour. Bacteria strains ferment efficiently at temperatures outside of those ranges. At higher temperatures, they produce lactic acid, which give one type of ‘base sour’ flavour. At lower temperatures, they produce acetic acid, which give a different type of sour note, that has more of a ‘tang‘.

